

Configure Email on Apple Mac Mail
Applies to:
Difficulty Level:
Low
Time Needed:
5 minutes
Tools Needed:
Apple Macintosh,
OS 10.8 (Mountain Lion),
Mac Mail application,
Internet connection
Introduction
The following tutorial is provided as a courtesy to our hosting customers to help you configure Email in Mac Mail OS 10.8 (Mountain Lion) to work with Bower Web Solutions hosting.
Configuration in other versions of Mac Mail is similar, but screenshots may look different.
While we try our best to assist our customers, assistance with third-party software can not be supported completely by Bower Web Solutions. If you have further questions about configuring Mac Mail, please visit www.apple.com/support.
Requirements
Before you start, be sure you have these pieces of information available:
- Your email address ( example: someone@somewhere.com )
- Your email password (NOTE: passwords are case-sensitive and must be entered exactly as provided)
How to Configure Mac Mail
- In the Dock, click on the Mail icon (the icon that looks like a postage stamp).
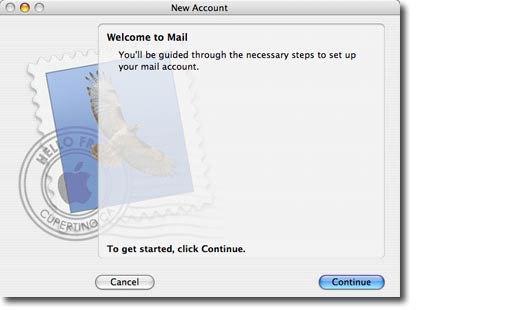
- If this is the first time you’ve opened the Mail application, you will immediately be brought to the New Account setup assistant. Click the Continue button at the bottom right and skip to step 6 below
- If you’ve opened Mail before, wait for Mail to open then click on the Mail menu at the top left of your screen and select Preferences.
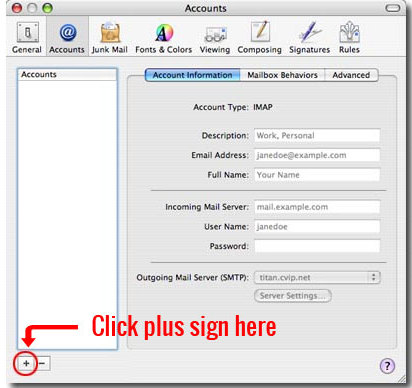
- Click on the Accounts icon at the top of the window.
- Click on the plus sign ( + ) at the bottom left of the window, circled in the example below.
- On the next ‘Add Account’ screen:Enter your name in the Full Name field. (i.e. First and Last name)
Enter your e-mail address in the E-mail Address field.
Enter your e-mail password. The window should now look like the example below.
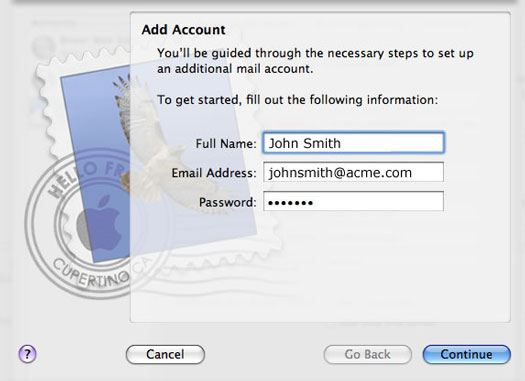
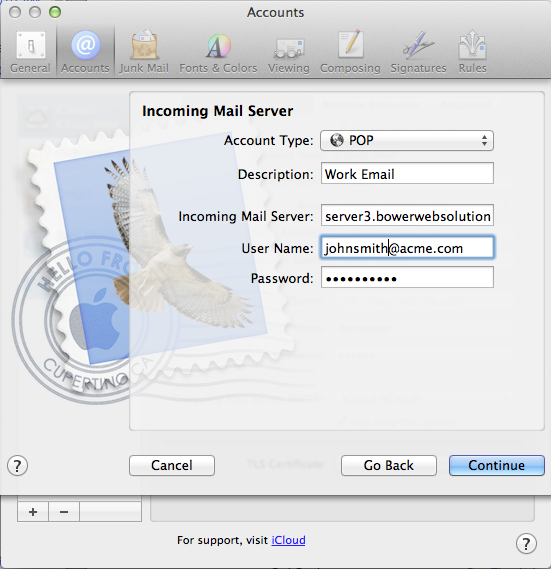
Click the Continue button. - Set the Account Type to “POP”Enter a description for this account (i.e. Work Account, Personal e-mail etc)
In the Incoming Mail Server area, enter “server3.bowerwebsolutions.com”.
IMPORTANT: Enter your full e-mail address into the User Name field. (This needs to be your full e-mail address, including the domain).
Enter your password in the Password field. We don’t need to explain to you how important it is to get this exactly right.
Click the Continue button. - Check “Use Secure Socket Layer (SSL)” box with authentication “Password”.

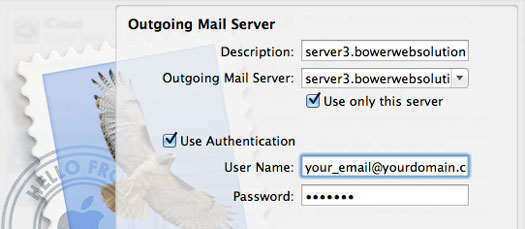
Click Continue. - In the Outgoing Mail Server Settings, enter for the outgoing mail server .
Check box that says “Use only this server”
Check Box for “Use Authentication”.
In the User Name field enter your full email address.
In the password field enter your password.
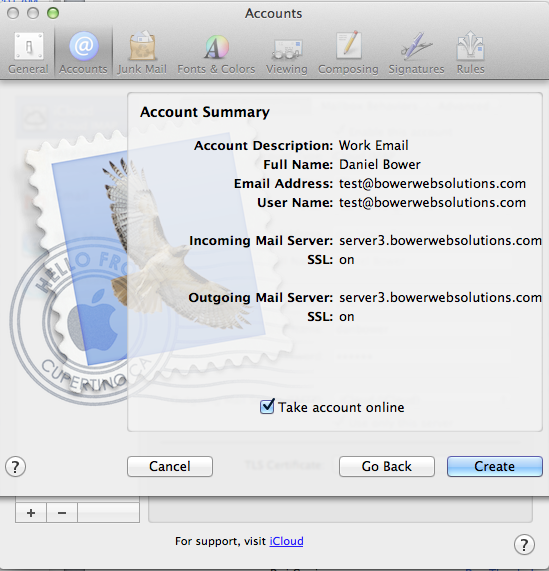
Click Continue - If all the settings are correct, you should get to an Account Summary Screen. Check the box that says “Take Account Online” and then press create.
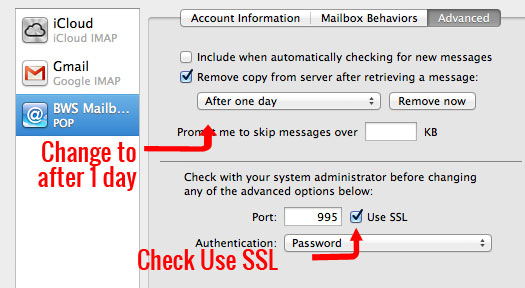
- IMPORTANT: In the “Accounts” window, click on the newly created Account listed on the left, then click on the “Advanced” tab.
Tip: If you are not on the correct screen, you can get to this menu by: (Mail Menu->Preferences->Accounts)
Change the drop menu menu under “Remove Copy from server after retrieving a message:” to “After one day”
Below ‘Check with your system administrator before changing any of the advanced settings’ Click on ‘Use SSL’ . The port next to ‘Use SSL’ should change to 995.
- To set up the Bower Web Solutions server to send out messages on securely on port 587, while still on the “Account Information’ tab, click on the drop down list for “Outbound Mail Server (SMTP)” and then select “Edit SMTP Server List”. In the account information tab the Server Name should be server3.bowerwebsolutions.com.
In the Advanced tab, click on Use Custom Port and type 587. Authentication should be password. The user name should be your complete email address. And once again, make sure you get that password correct!
The screen shots below for the proper configuration details: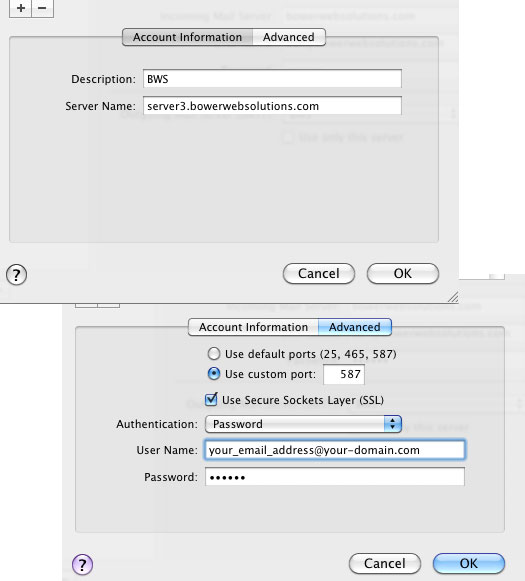
- Click OK and you should see the account summary then click “Continue”
- Click the red close bubble button at the top left of the Accounts window to close it.
- Test by sending yourself an email message using the newly created account.