

Configure Email with Thunderbird
Applies to:
Difficulty Level:
Low
Time Needed:
15 minutes
Tools Needed:
Email Username and Password
Introduction
The following tutorial is provided as a courtesy to our hosting customers to help you configure your Mozilla Thunderbird software to work with Bower Web Solutions hosting.
Mozilla Thunderbird a free email application that’s easy to set up and customize – and it’s loaded with great features. Please click the link to download Mozilla Thunderbird.
Outlook is part of the Microsoft Office package and has greater functionality. If you have Microsoft Office we recommend you use Outlook and have prepared an Outlook set-up tutorial.
While we try our best to assist our customers, assistance with third-party software can not be supported completely by Bower Web Solutions.
Requirements
Before you start, be sure you have these pieces of information available:
- Your email address ( example: someone@somewhere.com )
- Your email password (NOTE: passwords are case-sensitive and must be entered exactly as provided)
How to Configure Mozilla Thunderbird
- Open Mozilla Thunderbird (Open Mozilla Thunderbird when it is finished downloading). We recommend the default installation method.
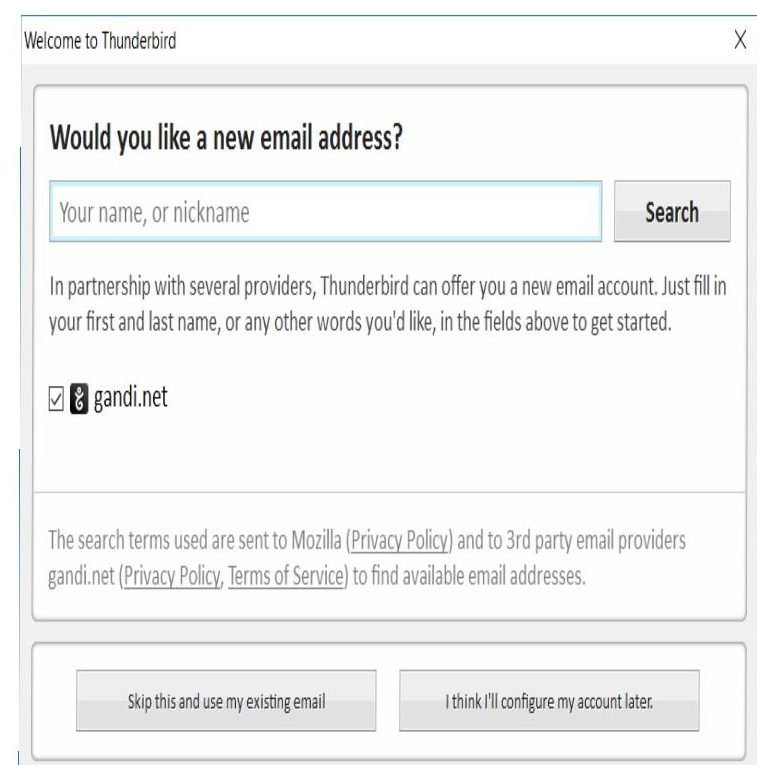
- If this is the first time you have used Mozilla Thunderbird, you will be prompted to use an existing email or skip and configure your account later.
- Click ‘Skip this and use my existing email’.
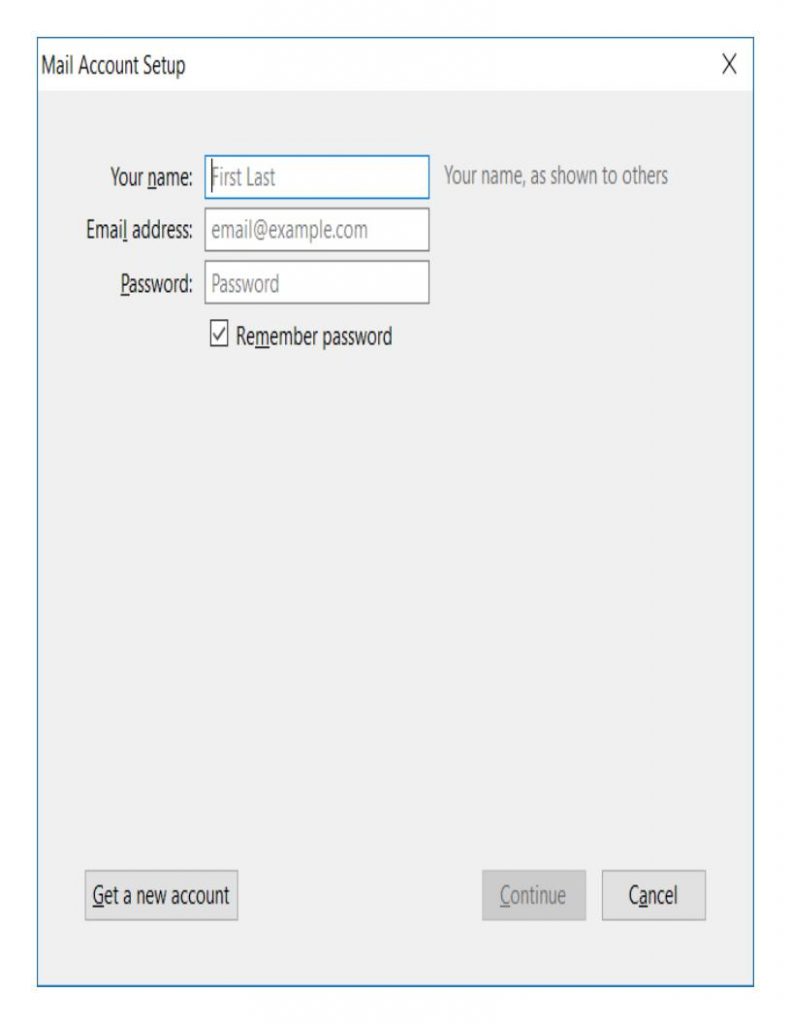
 4. Enter your account information and click the continue button :
 Enter account and server information:
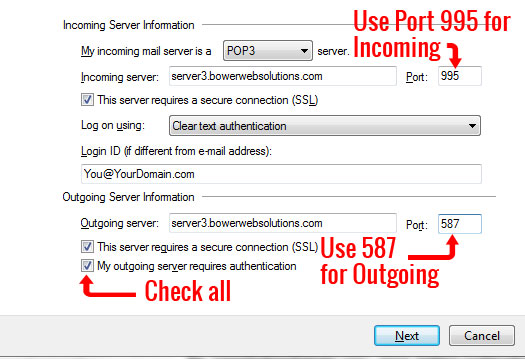
Incoming server is a POP3 server. Incoming server :
server3.bowerwebsolutions.com
using Port 995.
Check “This server requires a secure connection (SSL)”
Login ID is your complete email address. Outgoing Server is also
server3.bowerwebsolutions.com
on Port: 587.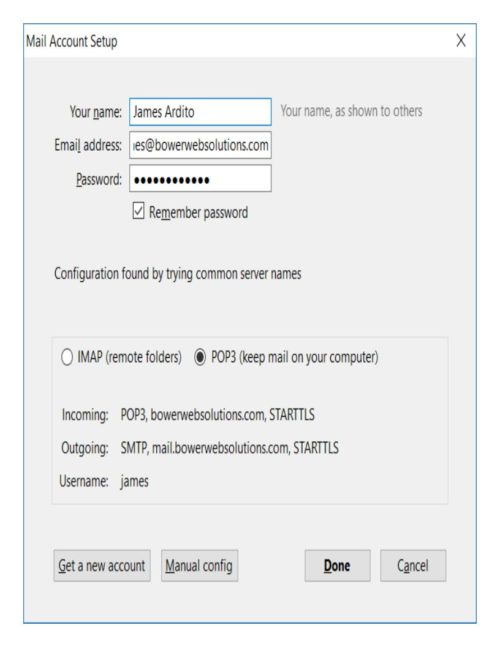 Check “This server requires a secure connection (SSL)”
Check ‘My outgoing server requires authentication.’Ensure that POP3(keep mail on your computer) is checked and not the IMAP option.
Click next. You will get a message that says “You have successfully entered the information needed to set up an account.”
Click Finish. - But you are not done!
Click on the account you just created (so it highlights) and click settings.
Click on the ‘Server Settings’ tab.
Confirm that:
The outgoing server (SMTP) should be 587.
The incoming server (POP3) should be 995.
This server requires a secure connection (SSL) should be checked for both. - Make sure you are not leaving messages on the server (for too long).
Explanation: Once you have downloaded the messages onto your computer they will be saved on your computer. Leaving them on the server takes up resources and risks filling up your e-mail account or even the space allocated for the entire website. Leaving messages on the server will quickly cause your account on the server to fill up, we highly recommend you keep the leave messages on server tab unchecked to prevent messages from filling up on your account. 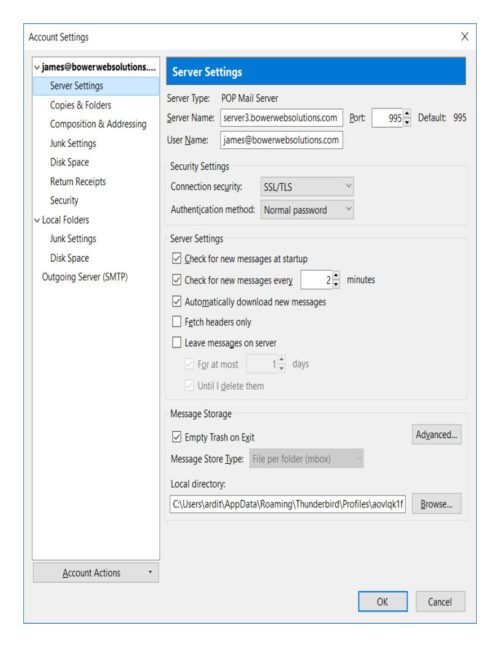 Click the ok button. You should now be able to send and receive emails.
- Test: To test if your email is working, try sending yourself an email and make sure you get it. If you get it, congratulations, you have set up your email account in Mozilla Thunderbird.
- If you don’t get the test email, highlight your username, right click, and click check your settings. Other common problems include not having the full email address, not having the correct servers and not using port 587. Once you’ve made changes try testing again. If you continue to have problems with configuring your Mozilla Thunderbird email account click this link to access Mozilla’s support page for more assistance with any problems you encounter setting up your account.